
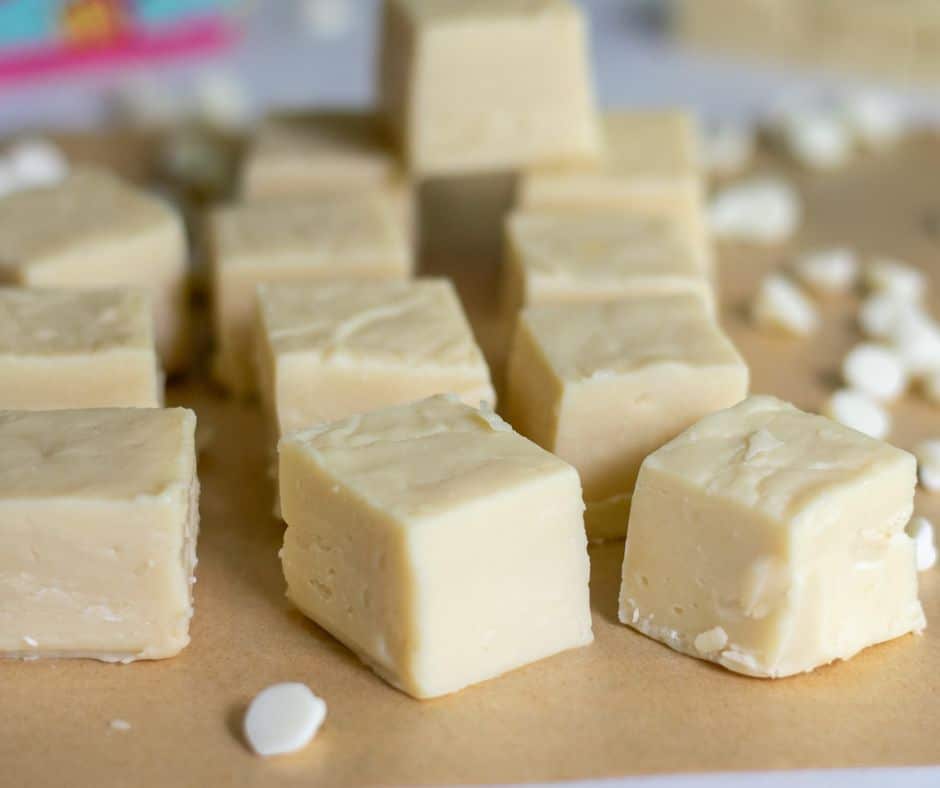
Buying fudge from a store as a child is a fond memory for many. My brother and I used to go to this store in downtown Jerusalem that sold toys and chocolate fudge by the pound. We didn’t care about the toys; we only wanted the fudge. Now, every time I make fudge, it brings back many memories of carefree days and fun summers. White Chocolate Fudge is my favorite fudge to make.
White chocolate fudge is a delicious and sweet confectionery treat to make. With just a few ingredients and some simple steps, you can create a mouthwatering dessert that many will love. The beauty of fudge lies in its simplicity, making it a great choice for holidays, parties, and gatherings.
Using the double boiler method is a simple and foolproof technique to make creamy and smooth fudge without the risk of burning the chocolate.
Craving more sweets? Check out my Half Moon- Black and White Cookies, Mandel Bread (Mandelbrot) with White Chocolate, and Game-Changing Tahini Chocolate Cookies.
Why You’ll Love White Chocolate Fudge
Easy to Make: It can be made with just a few basic ingredients and doesn’t require baking.
No-Bake dessert: White chocolate fudge is a great option when you want a delicious dessert without using an oven.
Versatility: White chocolate fudge is incredibly versatile, allowing you to experiment with various add-ins and flavors. You can add nuts, dried fruits, cookies, candies, or even swirl in fruit purees or food coloring to create visually stunning and flavorful variations.
Great for gifting: White chocolate fudge makes a fantastic homemade gift for special occasions and holidays.
Ingredients Overview
White chocolate/white chocolate chips: Provides the base flavor and creamy texture. Brand recommendations: Ghirardelli and Lindt. These brands often provide high-quality white chocolate suitable for baking and confectionery purposes.
Sweetened condensed milk: This thick and sweet milk adds sweetness, moisture, and richness to the fudge.
Butter (salted or unsalted): Butter contributes to the smoothness and richness of the fudge, adding a creamy and velvety mouthfeel.
Optional- flavorings: Add about ⅓ cup of chopped nuts, chopped dried fruits, and sprinkles to customize the fudge to your liking.
Pro-Tips:
Stir constantly: When cooking the fudge mixture, stir continuously with a heat-resistant spatula to distribute the heat evenly.
Use high-quality ingredients: Choose high-quality chocolate, sweetened condensed milk, and butter. The better the ingredients, the better the end result will be.
Line the pan: Line your baking dish with parchment paper or lightly greased aluminum foil, leaving an overhang on the sides. This makes it easier to lift the set fudge out of the pan easier for cutting.
Add mix-ins strategically: If you want to add nuts, dried fruits, or other mix-ins, fold them into the fudge mixture once you remove it from the heat. This way, they won’t interfere with the cooking process.
Be patient when cooling: Allow the fudge enough time to cool and set properly. Avoid the temptation to rush the process by putting it in the refrigerator, as this may lead to uneven texture or condensation on the surface.
Slice with a warm knife: Heat the knife blade under hot water and wipe it dry before each cut to get clean and smooth pieces. This will help prevent the fudge from sticking to the knife.
FAQs
Store the fudge in an air-tight container to prevent it from absorbing moisture and becoming sticky. Keep the fudge in the refrigerator for up to 3 weeks.
Freezing: Fudge can be frozen for up to 2 months. Just make sure to wrap it tightly in plastic wrap and place it in an airtight container before freezing. Thaw overnight in the refrigerator before serving.
I suggest using an 8-inch square pan, which will result in thicker fudge squares. However, a 9-inch pan works too. Just make sure to line the pan with aluminum foil or parchment paper to allow for easy removal of the fudge block once it sets.
More Recipes You’ll Love
Nostalgic Israeli Birthday Cake
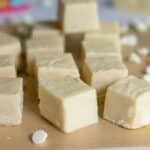
White Chocolate Fudge
Description
Equipment
- Aluminum foil and cooking spray
- Food scale optional
Ingredients
- 450 grams white chocolate or about 2 1/4 cups of white chocolate chips
- 1 can sweetened condensed milk
- 2 Tablespoons (30 grams) butter salted or unsalted
- optional 1/3 cup chopped nuts/chopped dried fruits/sprinkles
Instructions
Prepare the pan:
- Line your baking dish with parchment paper or aluminum foil (spray foil with nonstick spray), leaving some excess paper on the sides to easily lift the fudge out later.
Assemble the double boiler:
- Fill the bottom of a saucepan with a few inches of water and place it on the stovetop over medium heat.
- Add the white chocolate, condensed milk, and butter to a heatproof bowl that fits securely over the bottom pan.
- Allow the water in the bottom pan to come to a gentle simmer or low boil. The steam generated will gently heat the top bowl and melt the ingredients inside. Stir the mixture continuously using a spatula until everything is fully melted and well combined.
Remove from heat:
- Remove the double boiler once the mixture is smooth and all the ingredients are melted. Be cautious when handling the double boiler, and use oven mittens, as both pans will be hot. You can also add chopped nuts, dried fruits, or any other desired toppings at this point.
- Pour the fudge mixture into the prepared baking dish and spread it out evenly using a spatula.
- Let the fudge cool at room temperature for a while before transferring it to the refrigerator. Chill the fudge in the refrigerator for at least 3-4 hours or until it becomes firm.
- Once the fudge has solidified, lift it out of the baking dish using the excess parchment paper or foil, and place it on a cutting board.
- Cut the fudge into small squares or any desired shape using a sharp knife.

6 comments
SO EASY
Added chopped pecans!
Came out great thank you!
yay!
So easy, delicious
yum