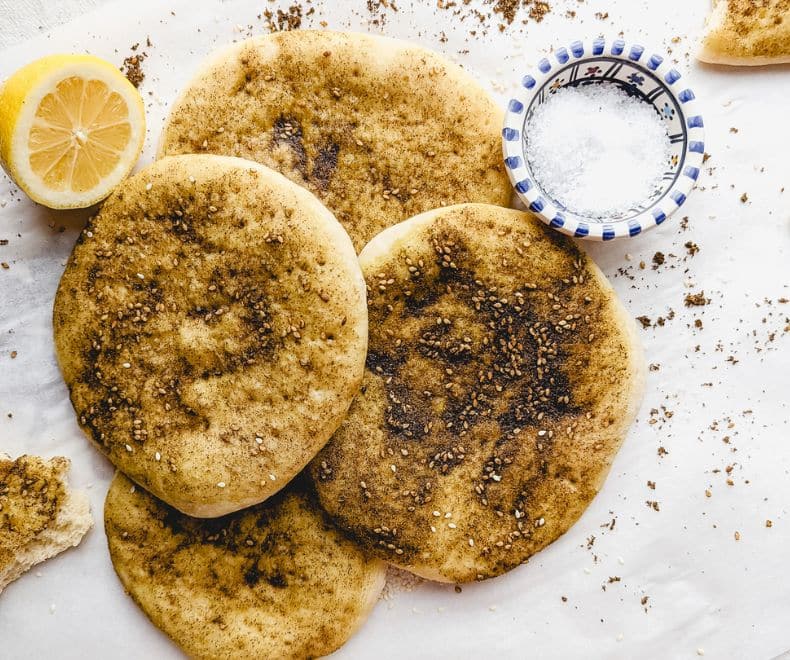
Making pita Mediterranean Pita bread at home is a fun and rewarding experience that results in irresistible bread that is far superior to its store-bought counterpart. This recipe for homemade pita bread is simple and easy to follow, requiring only a few basic ingredients and minimal effort.
Serve the warm pita bread with your favorite dips like hummus or as a side to your favorite dishes.
Ingredients Overview
*The full recipe is in the recipe card below!
Za’atar: A Middle Eastern spice blend that is commonly used in cooking and as a seasoning for various dishes. It typically consists of a mixture of dried thyme, oregano, marjoram, sumac, sesame seeds, and salt. The exact composition and ratios of the ingredients can vary depending on the region and personal preference.
Za’atar is often used to flavor breads, meats, vegetables, and dips. It has a tangy, savory, and slightly nutty taste and can be used both as a dry rub or mixed with oil and used as a dip.
Flour: I use all-purpose flour, but you could use bread flour or a combination of bread and all-purpose. Remember that bread flour has a higher protein content; you might need to add more liquid to form the dough. I strongly recommend sifting the flour; it will result in a more delicate dough with a more significant volume.
Yeast (active dry yeast): Active dry yeast needs to be bloomed in liquid before being used to make dough. However, it is not necessary to bloom newly purchased yeast. Instead, it can be added directly to the dry ingredients.
Olive oil: Use your favorite kind of olive oil.
FAQs
Store the cooled pita wrapped in plastic wrap or in an airtight container on the counter for up to two days. The pita will start drying out after 24 hours, but the good news is that it freezes well.
Once the pita is completely cooled, wrap it in a few layers of plastic wrap, then in foil. Store it in the freezer for up to a month. Thaw the wrapped pita at room temperature. Before serving, warm the pita in a 325°F oven for 5 to 7 minutes or until warmed through.
More Recipes You’ll Love
Israeli Salad with Tahini Dressing
Mediterranean Pita bread
Description
Equipment
- A standing mixer fitted with a dough hook
- Parchment paper
- Pastry brush
- Rolling pin
- Lemon squeezer optional
- Food scale optional
Ingredients
For the Pitas
- 3 1/2 cups (500 grams) all-purpose flour plus a little more for dusting
- 1 tablespoon (10 grams) active dry yeast
- 1 tablespoon (10 grams) granulated sugar
- 2 Tablespoons (30ml) olive oil plus a little more for greasing
- 1 1/2 cups (360 ml) lukewarm water
- 1/2 teaspoon salt
For the Za'atar spread:
- 1/2 cup (120 ml) olive oil
- 1/4 cup Za'atar spice
- 1 teaspoon fresh lemon juice
- 1/4 teaspoon coarse salt
Instructions
The dough:
- In a large standing mixer fitted with the dough hook, combine flour, yeast, and sugar. Mix on a low speed for 1 minute
- Add olive oil.
- While the mixer is on low speed, slowly add water and mix to form the dough.*Because each flour is different, stored differently, and has different absorption capacities, the amount of liquid will almost always change. Even if you always use the same flour, it may be that on different days, the flour will absorb more liquid than before. So, start with half a cup of water and gradually add enough until the dough is formed.
- Add the salt and knead for 8-12 minutes (it helps the gluten form and the dough to be elastic with better structure). The dough should be smooth, shiny, and a little bit sticky!
- Grease the dough with a little bit of oil, cover it with plastic wrap and let it rise until doubled in size, for about 1-2 hours.
The Za’atar spread:
- Mix all the ingredients well, set aside.
The pitas:
- Preheat the oven to 400°F/200°C.
- Flour the work surface.
- Divide the dough into 10 equal pieces (about 85-100 grams per piece). Roll into balls the size of baseballs. Cover with a damp cloth and let them rest for 10 minutes.
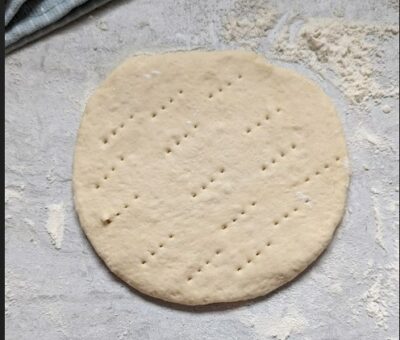
- Roll each dough ball to about ¼-inch (½ cm) thickness with a rolling pin.
- Cover a baking sheet with parchment paper.
- Place up to 3-4 pitas onto the baking sheet (keep the rest of the dough balls covered).
- Use a fork to prick the surface of the dough several times all over. This will prevent the pita bread from puffing up too much.
- Brush the tops with the Za’atar mix (about 1 tablespoon for each pita).
- Bake for 10 minutes.
- Repeat with remaining pita rounds until all are baked. Cover with a kitchen towel until ready to serve.
- Serve warm, ideally on the same day, or keep in the freezer until ready to be enjoyed.
Great recipe thank you
🙂
love it! Can I use spelt flour?
yes!
Can I make it without zaatar?
you can, but it adds a lot
Great recipe
thank you
love it
thank you
LOVE
Can I make it with whole wheat flour?
yes! I would do half white flour and half whole wheat