Growing up in Israel, I ate my fair share of authentic Israeli falafel. In most of my favorite childhood memories, you better believe that falafel was hanging out in the background. I think there is nothing like biting into a well-seasoned, warm, and crunchy falafel ball. Drizzle over tahini sauce, and you will be in Middle Eastern heaven.
Over the years, I have learned how to make my own authentic falafel, and I am super excited to share my recipe with you! The good news is that making falafel at home is easy.
Do note that the dried chickpeas will need to soak for at least 8-12 hours, so remember to soak the chickpeas the day/evening before you make your falafel.
What is Falafel?
Falafel are delicious balls of chickpea (or fava beans) and herb goodness. The mixture is then formed into balls and deep-fried until crispy on the outside and soft on the inside. Naturally vegan and vegetarian, falafel is great in wraps, pitas, sandwiches, and salads.

Ingredients Overview
*The full recipe is in the recipe card below!
Great ingredients are key to great falafel!
Chickpeas (Garbanzo beans): For this authentic falafel recipe, only use dried and soaked chickpeas, not cooked or canned.
Parsley and cilantro: These two delicious herbs add loads of flavor to your falafel.
Onion: Yellow or white.
Bread or bread crumbs: This helps to bind the mixture together and retain the shape while frying. I usually use a slice of day-old Challah bread. Other types of bread can be brioche, sourdough, or French bread. Another option is to use ½ cup of unseasoned breadcrumbs.
Baking soda: Helps provide the fluffy inside texture of the falafel. I do not recommend omitting it.
Oil for frying: Use high-heat stable oil like Canola or vegetable.
Why Not Use Canned Chickpeas?
Traditional falafel is made with dried chickpeas that have been soaked in water overnight. This is what gives falafel its incredible crispy texture. Using canned chickpeas will result in overly soft and mushy falafels, nothing like a truly authentic falafel.
How to Make Authentic Israeli Falafel Step by Step:
Step 1: Soak your dried chickpeas: Soak the chickpeas overnight or for at least 8-12 hours (up to 24 hours). Then drain and rinse them.
On occasion, you’ll find small rocks or debris mixed in with dried chickpeas. To avoid eating them, rinse the lentils in a fine mesh sieve and pick them over before you soak them. Discard any shriveled lentils in addition to debris.
Where to find dried chickpeas?
You can find dried chickpeas at Middle Eastern stores, health stores (like Whole Foods), spice stores, and major grocery chains (usually in the ethnic food aisle).
Step 2: Make the mixture: Add chickpeas, garlic, onion, and spices to a food processor and pulse a little bit at a time until the mixture is finely ground. Soak the bread in water for a minute. Drain, crumble, and add to the mixture. Process until a coarse and moist texture is obtained. Add coriander, parsley, and sesame seeds and pulse until the mixture reaches a fine-grain texture, like coarse sand and not very mushy.
Step 3: Refrigerate: Transfer the falafel mixture to a bowl, cover it, and refrigerate it for at least 1 hour or overnight. The chilled mixture will hold together better, making the falafel balls easier.
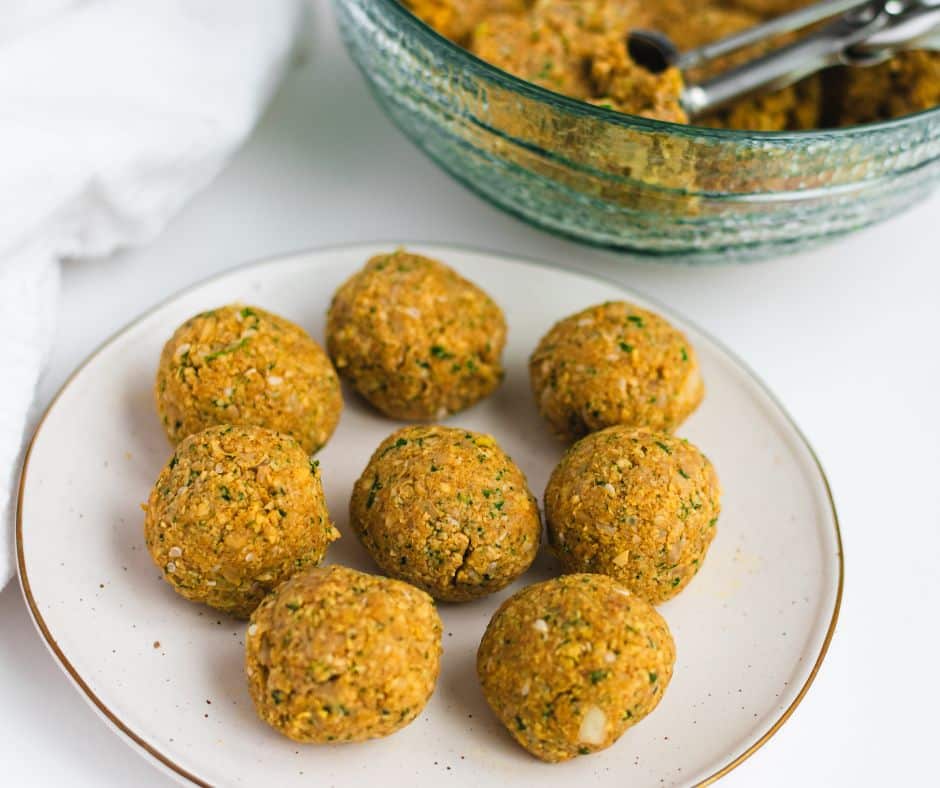
Step 4: Form balls: Once the falafel mixture has been chilled, stir in baking soda, then with wet hands, form balls.
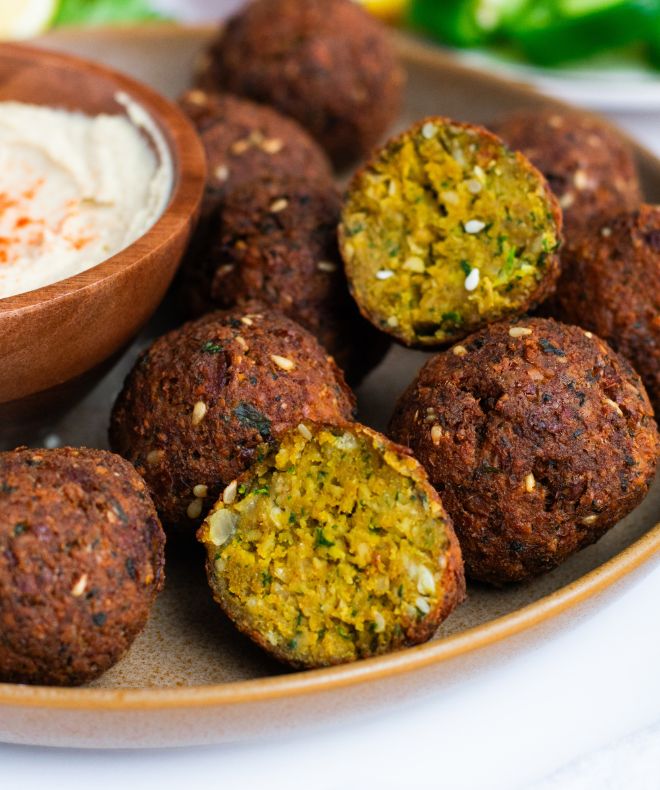
Step 5: Fry: Heat 3” of oil on medium-high until it bubbles softly. Carefully drop the falafel in the oil (no more than 4-5 balls at a time) using a slotted spoon, and fry for 3-5 minutes until medium brown on the outside. Once cooked, falafel should be crispy and medium brown on the outside and fluffy and light green on the inside.
Can Authentic Israeli Falafel Be Baked?
Yes, but the texture won’t be quite as authentic; they’ll be slightly less crispy and golden.
Preheat your oven to 425°F/220°C. Spray or brush a baking sheet with oil. Place the falafel on the baking sheet, spray or brush the top side with oil, and bake for 25-30 minutes, flipping halfway through.
Pro-Tips
Always use dry chickpeas. Dry chickpeas that have been soaked in water for 12-24 hours will give you the best texture.
Chill the falafel mixture. Chilling for at least 1 hour helps with the shaping.
Fry in bubbling oil, and do not crowd the saucepan. Deep frying is the best option for perfectly crispy falafel. It’s always a good idea to fry one falafel first to ensure the oil temperature does not need to be adjusted. The ideal temperature for frying falafel is between 350°F (175°C) and 375°F (190°C).
More Recipes You’ll Love
Israeli Salad with Tahini Dressing

Authentic Israeli Falafel
Description
Equipment
- Food processor
- Candy/oil thermometer optional
- Slotted spoon optional
Ingredients
- 2 cups dried chickpeas Soak them in water for 12-14 hours and drain.
- 5 garlic cloves chopped
- 1/2 small onion coarsely chopped
- 1 Teaspoon cumin
- 1 Teaspoon paprika
- 1/2 Teaspoon salt
- 1 slice white bread (I like to use leftover Challah or baguette) or 1/2 cup of breadcrumbs
- 1/2 cup cilantro chopped
- 1/2 cup parsley chopped
- 1 Tablespoon sesame seeds
- 1 Teaspoon baking soda
- neutral oil for frying like canola
Instructions
Falafel:
- Place the soaked chickpeas in a food processor with garlic, onion, and spices.
- Soak the bread in water for a minute. Drain, crumble, and add to the mixture. Process until a coarse and moist texture is obtained. Or add the breadcrumbs (no soaking in water).
- Add cilantro, parsley, and sesame seeds. Pulse until the mixture reaches a fine-grain texture, like coarse sand, and not very mushy.
- Transfer to a bowl, cover, and put in the refrigerator for 1-2 hours.
When ready to fry:
- Add the baking soda to the mixture and mix well.
- Make small balls with wet hands.
- Heat the oil on medium-high until it bubbles softly. *The ideal temperature for frying falafel is between 350°F (175°C) and 375°F (190°C).
- Very carefully, drop the falafel in the oil, about 4-5 falafel at a time, and fry for 3-5 minutes until medium brown on the outside.
- Transfer the falafels to a bowl lined with a paper towel.
- Repeat with the remaining falafels. Once cooked, falafel should be crispy and medium brown on the outside and fluffy and light green on the inside.
- Serve immediately!
Yum
thank you
Came out perfecr
Turned out great!!!
Turned out amazing!
yay!
Turned out amazing
thank you
Great recipe and thank you for all the tips!
thank you!!
How many servings per recipe? And what temp does the oil have to be at?
Hi about 16 balls.
I didn’t take the temperature. My recommendation is to heat 3” of oil on medium-high until it bubbles softly.
I liked the way you wrote this recipe. Clean, concise, to the point. Many recipes blah blah blah so there can be more ads. You had very useful content and I appreciated your style and the recipe! Thanks!
thank you!