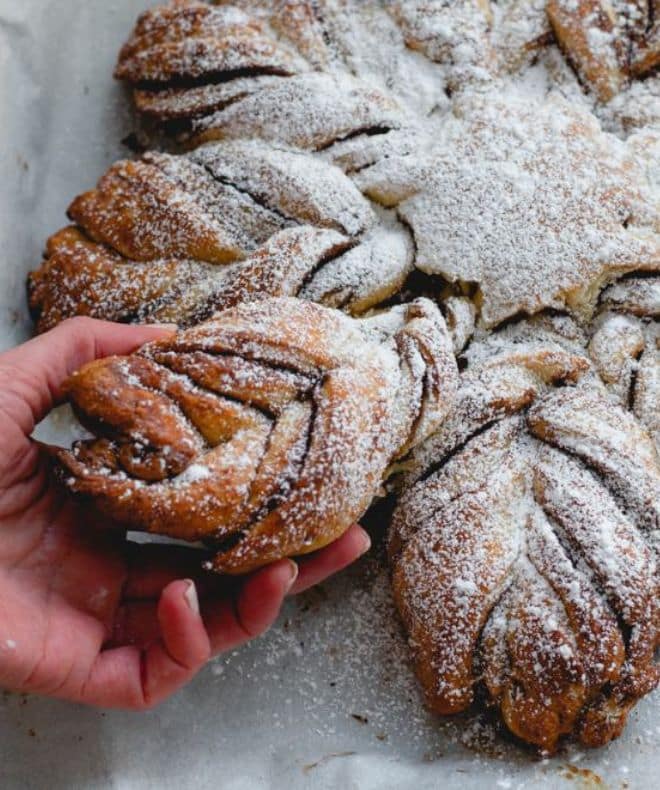
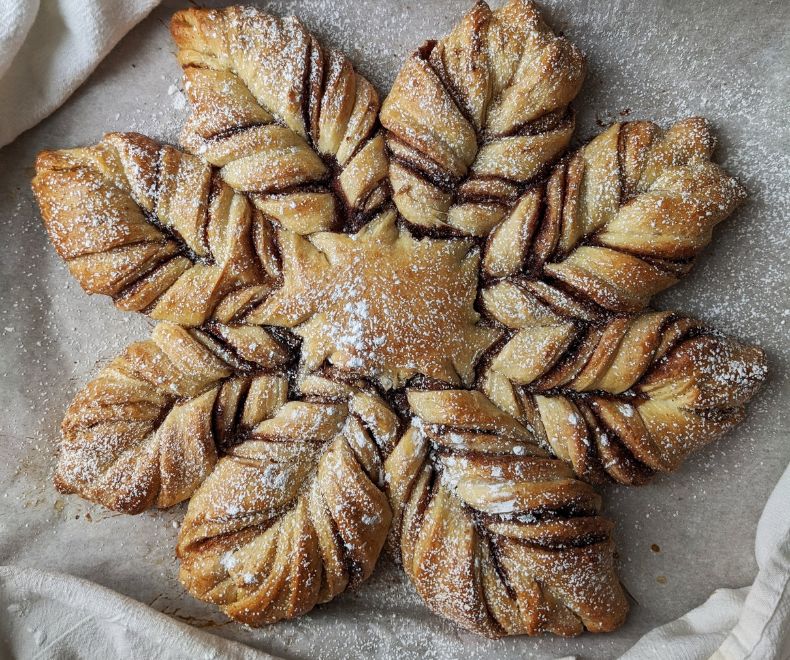
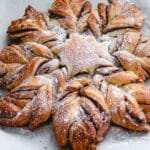
Snowflake Pull-Apart Chocolate Babka will make a great addition to your party spread or brunch menu! Top it off with powdered sugar, and you might not be able to stop at just one piece.
For my “The Complete Challah Guide” FREE ebook, join my mailing list here.
Making babka takes less than an hour of actual work! The rest of the time is the proofing and baking. That can range between 4-12 hours! I highly recommend reading all of my tips and tricks for the best results!
Ingredients Overview
Flour: I use all-purpose flour, but you could use bread flour or a combination of bread and all-purpose. Remember that bread flour has a higher protein content; you might need to add more liquid to form the dough. I strongly recommend sifting the flour; it will result in a more delicate dough with a more significant volume.
Yeast (active dry yeast): Active dry yeast needs to be bloomed in liquid before being used to make dough. However, it is not necessary to bloom newly purchased yeast. Instead, it can be added directly to the dry ingredients.
Sugar: For the sweetness of course. But sugar also feeds the yeast, increases its activity, and tenderizes the dough.
Eggs: Large eggs at room temperature.
Milk: The high-fat content of whole milk will make your cake more soft and tender. No skim milk in this recipe, please.
Butter: Unsalted and cut into small pieces.
Salt: To balance the flavors, don’t skip!
Chocolate spread: Store-bought or homemade. I used Nutella.
How to Make Snowflake Pull-Apart Chocolate Babka
Make the dough: This dough is soft, a little sticky, puffy, and very buttery yeast dough– read my pro-tips below.
Let the dough rise: Allow the dough to rise in a relatively warm environment for 90 minutes to two hours or until it doubles in size. This dough is rich in fat, so it takes longer than other doughs to rise.
Divide dough into 3 pieces.
Shape, then let it rise again. Work with only one piece of dough at a time. Place a clean towel over the dough you aren’t working with so it won’t dry out.
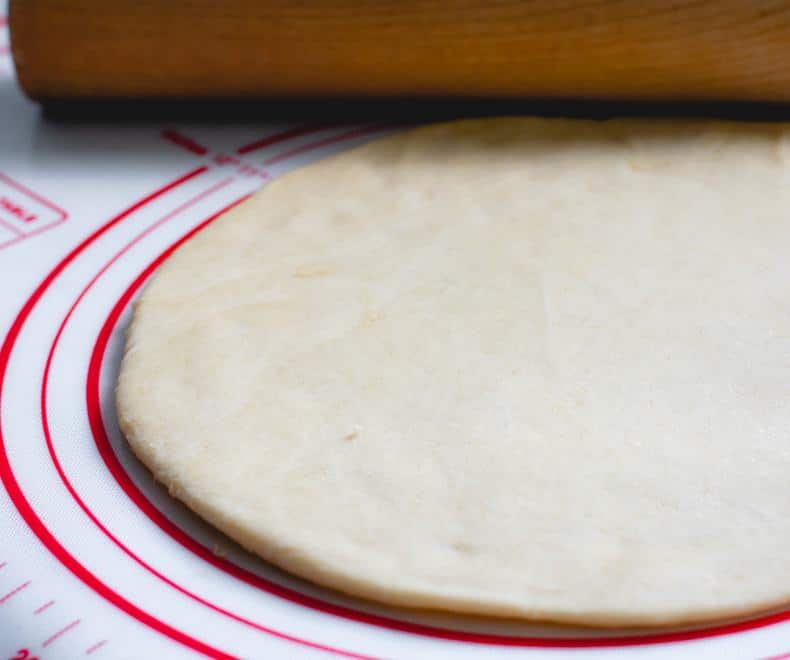
Roll one piece of dough into a 10-inch circle, about 1/2- 3/4 inch thick. I used a pastry silicon mat with measurements, and it was extremely helpful.
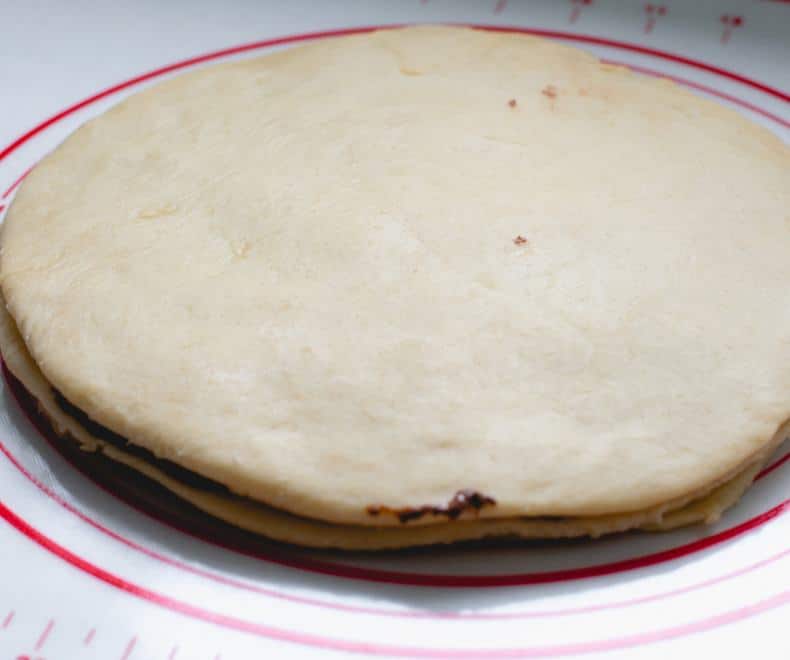
Place one circle on a parchment-lined baking sheet. Spread 1/2 of the filling over the dough, leaving a 1/2-inch border around the edge. Place another circle of dough on top and spread with the remaining 1/2 of the filling. Finish with the 3rd dough round.
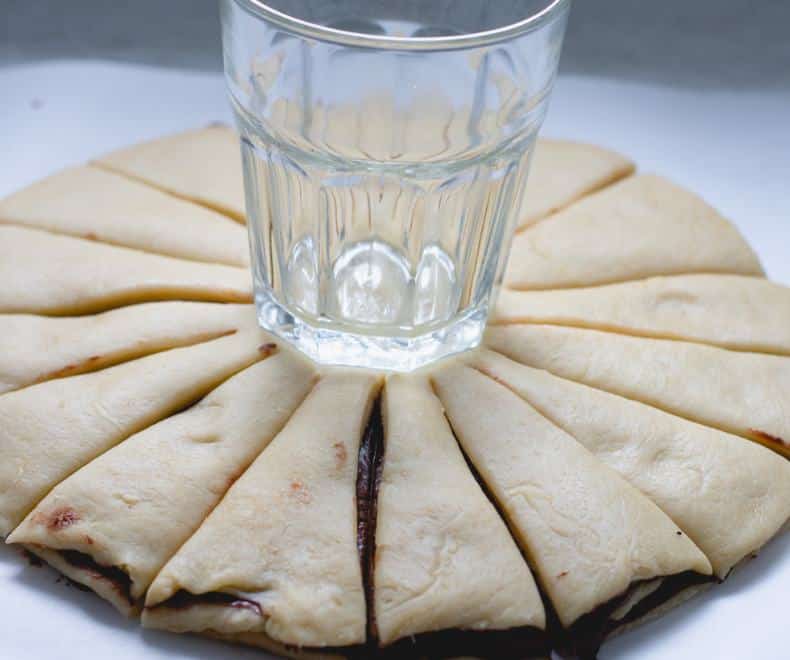
Place a 2-inch wide glass or a round cookie cutter in the center of the dough. Using a sharp knife, cut the dough into four triangles, then cut each triangle in half, creating 8 triangles. Now cut each triangle in half again to make a total of 16 triangles (see photos for a guide). Remove the glass.
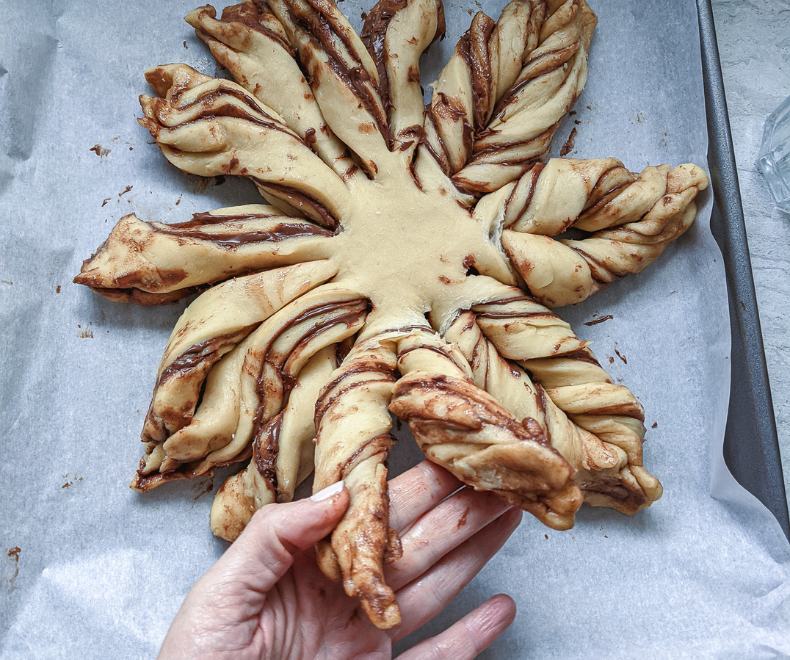
Lift the edges of 2 wedges that are next to each other and twist them away from each other. Pinch the ends to seal and repeat with the remaining pairs of wedges.
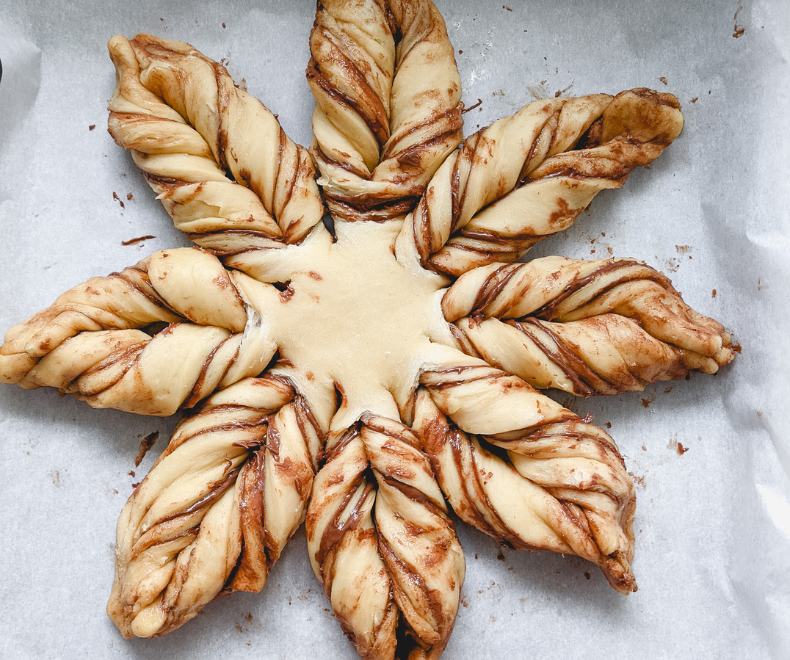
Cover the dough with a clean towel and allow it to rest and puff for 45 minutes to an hour.
How Do I know When Babka is Done?
When it’s ready, the babka will be a deep golden brown on top. A toothpick or cake tester inserted into the center of the loaf should come out without any wet dough sticking to it (melted chocolate is okay). If you have an instant-read thermometer, it should read between 190°F to 200°F in the center of the loaf. Let the babka cool to room temperature before slicing.
FAQs
Store the cooled babka wrapped in plastic wrap or in an airtight container on the counter for up to two days. This cake will start drying out after 24 hours, but the good news is that it freezes well.
Once the babka is completely cooled, wrap it in a few layers of plastic wrap and then in foil. Store it in the freezer for up to a month. Thaw the wrapped babka at room temperature. Before serving, warm the babka in a 325°F oven for 10 to 15 minutes or until warmed through.
More Recipes You’ll Love
Snowflake Pull-Apart Chocolate Babka
Description
Equipment
- A standing mixer fitted with a dough hook
- 2-inch wide glass or a round cookie-cutter
- Parchment paper
- Baking sheet
- Pastry silicon mat with measurements
- Rolling pin
- Pastry brush
- Chef knife or a dough scraper
Ingredients
For the dough:
- 1 stick (110g) unsalted butter cut into small pieces
- 3/4 cup (180ml) whole (full-fat) milk
- 3 and 1/2 cups (500g) all-purpose flour, sifted plus extra for dusting and kneading
- 1/3 cup (70g) granulated sugar
- 1 Tablespoon (10g) active dry yeast
- 2 large eggs at room temperature
- 1/2 Teaspoon salt
- butter or natural oil for greasing the dough
- 1 cup chocolate spread like Nutella
For brushing
- 1 any size egg
- 2 Tablespoons (30ml) milk or water
For garnish:
- 1/4 cup (30g) powdered sugar
Instructions
Make the dough:
- Melt the butter in a microwave-safe bowl. Add the milk and stir well.
- Place flour, yeast, and sugar in a standing mixer fitted with the dough hook and mix on low speed until combined.
- Add the eggs and milk mixture, and mix on medium speed until the dough comes together (2-3 minutes). Add salt. If the dough hasn’t come together, add a few drops of water or milk. Occasionally scrap the sides of the bowl with a rubber spatula to ensure all ingredients are incorporated. Continue mixing for about 10 minutes on medium speed until the dough is completely smooth, elastic, and shiny, and pulls away from the sides of the bowl.
The first rise:
- With floured hands, transfer dough to a large bowl and grease the top with oil. Cover with a towel or plastic wrap, and leave in the fridge for at least half a day or overnight (if placed a long time in the fridge the dough can become hard – that’s normal; leave it at room temperature to soften for 30-60 minutes or until it’s easy to work with). Alternatively, place at room temperature for 2-4 hours or until almost doubled in size.
Assemble the snowflake:
- Remove the dough from the bowl and put it on a lightly floured surface. Using a sharp knife or dough scraper, cut the dough in three. Work with only one piece of dough at a time. Place a clean towel over the dough you aren’t working with so it won’t dry out.
- Roll one piece of dough into a 10-inch circle, about 3/4 inch thick. I used pastry silicon mat with measurements, and it was extremely helpful.
- Place one circle on a parchment-lined baking sheet. Spread 1/2 of the chocolate over the dough, leaving a 1/2-inch border around the edge. Place another circle of dough on top and spread with the remaining 1/2 of the filling. Finish with the 3rd dough round.
- Place a 2-inch wide glass or a round cookie cutter in the center of the dough. Using a sharp knife, cut the dough into four triangles, then cut each triangle in half, creating 8 triangles. Now cut each triangle in half again to make a total of 16 triangles. Remove the glass.
- Lift the edges of 2 wedges that are next to each other and twist them away from each other twice. Pinch the ends to seal and repeat with the remaining pairs of wedges.
Second rise:
- Cover the dough with a clean towel and allow it to rest and puff for 45 minutes to an hour.
Bake:
- Preheat the oven to 350°F/180°C.
- Whisk 2 tablespoons of milk with the egg and brush the snowflake. Bake for 35-45 minutes or until babka is golden brown on top. Remove from the oven and generously sprinkle powdered sugar.
Looks AMAZING
I love it
Love the step by step instructions
I made this beautiful bread to give to neighbors for Christmas. I used a cinnamon and sugar filling because they have a nut allergy. I got so many compliments and thank you’s! It was a big hit with everyone in my house too. Thank you Rachel!
Thank you so much!!! Happy holidays
Absolutely amazing!
Made it with cinnamon spread for TJ! Turned out amazing
Love it
thank you
So glad I found this recipe
thank you
Can I make it vegan?
you can use this dough https://mamalivingabroad.com/vegan-chocolate-babka/
lOVE it
all I have is instant yeast. Do I use the same amount?
HI. Not the same amount. 1 tablespoon of active dry yeast, you can substitute it with:
2 ¼ teaspoons of instant yeast (which is 25% less).
Thanks I made it for break fast. I made cinnamon sugar filling with butter since we were doing dairy. It turned out great!👩🏻🍳
thank you!!! Looks amazing
great recipe
make this every year!
YAY!