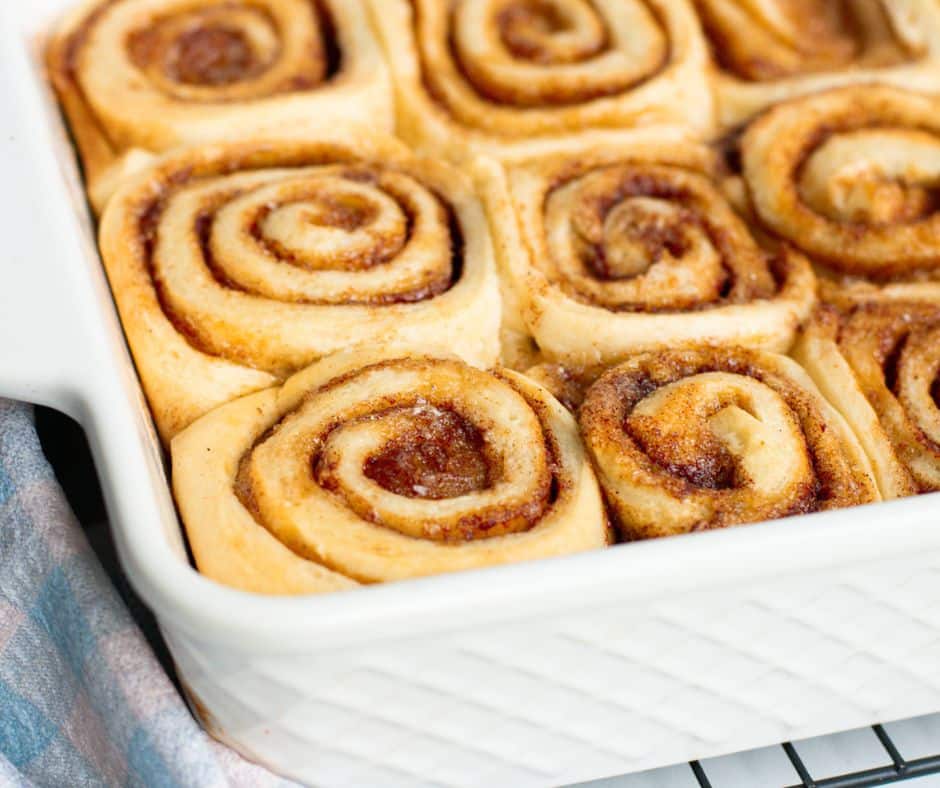
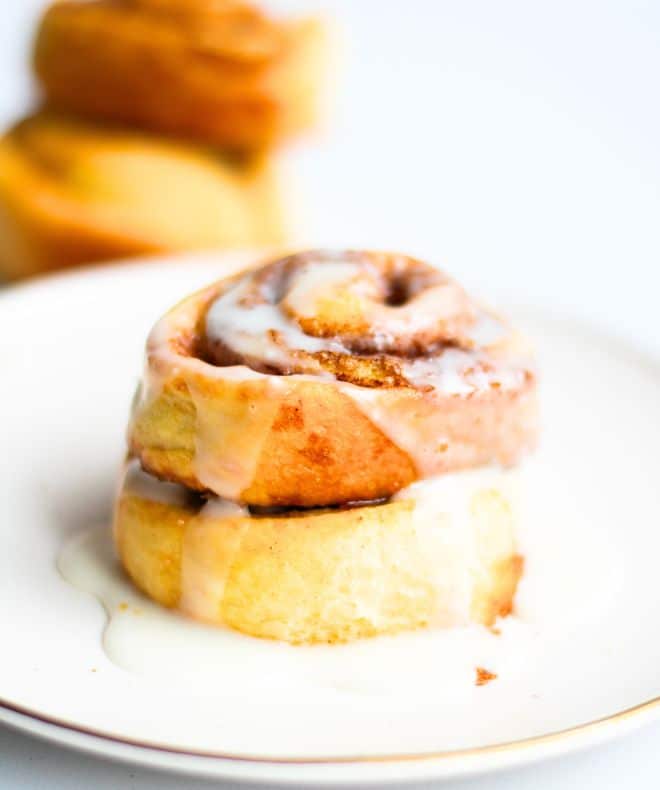
Challah Cinnamon Rolls are an enchanting addition to your holiday table, a special treat for a weekend morning, or a tasty dessert to share with friends and family. They combine the comforting flavors of homemade bread with the irresistible allure of cinnamon and sugar, making them a beloved favorite for many.
For my “The Complete Challah Guide” FREE ebook, join my mailing list here.
Here’s Why You’ll Love These Challah Cinnamon Rolls
- Requires only simple pantry ingredients
- Soft and fluffy
- Gooey cinnamon brown sugar swirl
- A showstopper dessert
Ingredients Overview
*The full recipe is in the recipe card below!
Before you start baking using this Challah Recipe, measure and prepare your ingredients so the cooking process will go smoothly and easily.
All-purpose flour: I use all-purpose flour, but you could use bread flour or a combination of bread and all-purpose. Remember that bread flour has a higher protein content and will give your bread more structure.
Water: It’s best to use water between 100°F and 110°F (38°C-43°C); it helps to activate the yeast. Don’t overthink the water temperature if you don’t have a thermometer. You want the water warm. Not hot. Not cold. Not freezing. Just warm.
Yeast (active dry yeast ): Active dry yeast must be bloomed in liquid before making dough. However, it is not necessary to bloom newly purchased yeast. Instead, they can be added directly to the dry ingredients.
Oil: Canola, vegetable, or Avocado oil can also work here.
Sugar and salt: Flavor.

3 Ingredient Filling
Butter: Use super-soft butter when preparing the filling – it should be neither too firm nor excessively melted. The butter won’t spread smoothly over the dough if it is too firm. If it’s overly melted, it will penetrate the dough, which is not what we desire. Butter at room temperature should be the perfect consistency.
Brown Sugar: Using brown sugar gives these rolls an extra-delicious depth of flavor.
Cinnamon: You can’t have cinnamon rolls without it!
How to Make Challah Cinnamon Rolls?
- Make the dough: The dough should be soft and stretchy but not at all sticky. It should also be resilient, easy to form into a tight ball, and, when risen, should be light, full of air, and soft like a foam pillow.
- Let the dough rise: Allow the dough to rise in a relatively warm environment for 90 minutes to two hours or until it doubles in size.
- Roll the dough into a long rectangle. Spread the softened butter on top and sprinkle with sugar and cinnamon. Roll up the dough to make a 17-inch (43-cm) log. Cut into 14-16 even rolls and arrange in a lightly greased pan.
- Let the dough rise again. The second rise can take 30 to 60 minutes, depending on the room temperature.
- Bake.
- Glaze.
Pro-Tips
- Weigh all your ingredients and get everything in order so you can follow the recipe exactly.
- Mixing the dough: Scrap the sides of the bowl occasionally with a rubber spatula to ensure all ingredients are incorporated.
- Water: Because each flour is different, stored differently, and has different absorption capacities, the amount of liquid will almost always change. Even if you always use the same flour, it may be that the flour will absorb more liquid on different days. So, start with half a cup of water and add as needed gradually. The dough should be very soft but not sticky.
- The first rise: About 90 minutes to two hours or until the dough doubles. But that figure can also change radically, especially if it’s particularly cold weather, which will then require a few hours for the dough to increase in size. In summer, it can be much shorter.
- Rolling and Cutting: Roll the dough tightly when creating the log to maximize the number of layers and create a swirl pattern. Use a sharp knife for clean, even cuts.
- Spacing: Space the cinnamon buns evenly in the pan, leaving a little room between them to allow for expansion during baking.
- Cooling: If you leave the cinnamon buns in the hot pan for too long after baking, the sugar and caramelized cinnamon can harden and cause sticking. Allow them to cool in the pan for just a few minutes, then transfer to a wire rack to cool completely.
FAQs
Allow the rolls to cool completely before storing them. Challah is always best eaten on the same day of baking. Place the rolls in a sealed plastic bag for up to 3 days.
Wrap the rolls tightly in two layers of plastic and stow them in the freezer for up to 3 months.
To defrost, leave the bread out at room temperature. When it has thawed, remove the plastic wrap and re-wrap it in foil. If you like warm rolls, pop them into the oven at 350°F/180°C for 10-15 minutes.
More Recipes You’ll Love

Challah Cinnamon Rolls
Description
Equipment
- Chef knife optional
- Instant read food thermometer optional
Ingredients
For the dough:
- 3 and 1/2 cups (500g) all-purpose flour plus a little more for dusting if needed
- 1 Tablespoon (10g) active dry yeast
- 1/4 cup (60ml) canola oil plus a little more for greasing
- 3 Tablespoons (30g) granulated sugar
- 1 and 1/4 to 1 and 1/2 cups (300-360ml) lukewarm water you want the water warm. Not hot. Not cold. Not freezing. Just warm.
- 1/2 Teaspoon salt
For the filling:
- 6 Tablespoons (86g) unsalted butter use super-soft butter when preparing the filling – it should be neither too firm nor excessively melted.
- 1 cup (210g) packed light or dark brown sugar
- 1 Tablespoon ground cinnamon
For brushing
- 3 Tablespoons (45ml) milk or heavy cream
For icing:
- 1 and 1/2 cups (180g) confectioners’ sugar sifted
- 1/2 Teaspoon pure vanilla extract
- 3 Tablespoons (45ml) heavy cream or milk or water
Instructions
Make the dough:
- In the bowl of a standing mixer, put flour and yeast and mix/stir for one minute.
- Add oil and sugar and mix for about one minute.
- Slowly add water and mix to form the dough .*Because each flour is different, stored differently, and has different absorption capacities, the amount of liquid will almost always change. Even if you always use the same flour, it may be that the flour will absorb more liquid on different days than before. So, start with half a cup of water and gradually add enough until the dough is soft but not sticky.
- Add the salt and knead for 8-12 minutes (It helps the gluten form and the dough to be elastic with better structure). Scrap the sides of the bowl occasionally with a rubber spatula to ensure all ingredients are incorporated.
- Transfer dough to a lightly floured surface. Using floured hands, knead the dough for 3-5 minutes. You should have a smooth ball of dough. If the dough is super soft or sticky, you can add a little more flour.
- Grease the dough with a bit of oil so it won't dry out; cover it with a kitchen towel or loosely with Saran wrap and let the dough rise until doubled (place the bowl somewhere warm).
Fill the rolls:
- Roll the dough out in a14×17-inch (36×43-cm) rectangle. Spread the softened butter on top. Mix the brown sugar and cinnamon. Sprinkle it all over the dough. Roll up the dough tightly to make a 17-inch log. Cut it into 14-16 even rolls and arrange it in a lightly greased rectangle– 9-inch x 13-inch pan.
- Place the pan somewhere warm, cover with a towel, and let it rise until puffed, about an hour.
- After the rolls have doubled in size, brush them with milk or cream.
Bake:
- Preheat the oven to 375°F (190°C). Bake for 20–25 minutes, or until lightly browned. If you notice the tops are getting too brown too quickly, loosely cover the pan with aluminum foil and continue baking. For precise assessment of their doneness, use an instant-read thermometer to measure their internal temperature- it should be around 195–200°F (91–93°C) when done. Remove the pan from the oven.
Make the icing:
- Whisk all of the icing ingredients together. Drizzle over warm rolls and serve immediately.
- Cover leftover rolls tightly and store at room temperature for up to 2 days or in the refrigerator for up to 5 days.


WOW
Came out so good!
thank you
Love it
Can I use GF flour?
Not sure…
we love it!
yay!